A PDF version of this guide, including project setup and debugging is available in the Documentation section.
This guide is targeted at Linux users, similar instructions for Windows can be found here.
In this second part of this guide on how to set up an embedded GCC toolchain within Eclipse on Linux, we’ll pick up on where we left off at the end of Part 1. We’ll take a look at workspace configuration and creating both managed and Makefile based projects. This guide is similar to one we previously wrote targeting Windows but it adds a few additional ways of selecting which toolchain is being used when building an Eclipse project. These ways can be useful on Linux where the PATH variable can quickly get cluttered when dealing with multiple toolchains and IDE on the same workstation.
This guide will start with the managed build project which is simpler to setup then move on to workspace and Makefile project setup.
Eclipse Managed Build Project
When creating a Managed Build project, it’s possible to use the instructions we published in a previous guide. Those instructions will work as is when the selected toolchain is available through the PATH variable. If that is not the case, which may be the case in Linux depending on the environment configuration and how Eclipse was started, an alternative method must be used.
When it’s time to select the cross GCC command prefix a path can be added to add the location of the toolchain automatically for that project.
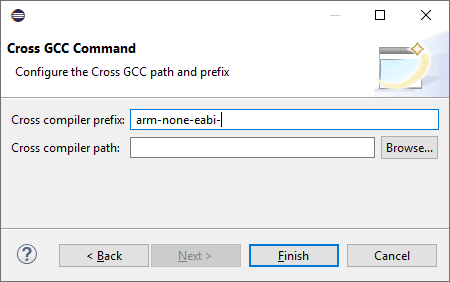
With this method it’s possible to select a different toolchain even a different version of the same toolchain, for each managed build project.
Eclipse Makefile Project
When creating a Makefile project the toolchain will be sourced from the PATH by make, unless absolute paths are used within the makefile which isn’t pretty. If the toolchain is available with in the PATH then the instructions found in our previous guide can be followed to create a Makefile project.
If however, the toolchain is not accessible through the default environment PATH variable, it is possible to either add it to the workspace specific environment variables or to each project’s environment. This section will go over the workspace environment while the project specific method is discussed in the next section.
Workspace Specific PATH Variable
First navigate to the workspace preferences by selecting the Window->Preferences menu item. This will open the preferences panel. From that panel select the C/C++ -> Build -> Environment from the left panel. This will display the workspace environment variable settings.

Make sure that the ”Append variables to the native environment” option is checked.
Click Add. In the new dialog enter PATH as the name and the full path to the desired toolchain bin directory. Note that since Eclipse will append the variables added in this configuration panel to the native environment it’s important not to add the usual $PATH reference.
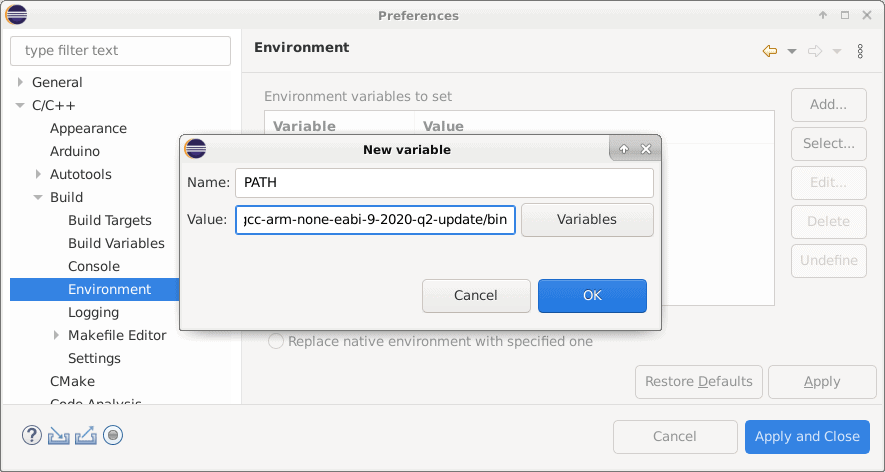
Click OK.

Click ”Apply and Close”, Now every new project built within the current workspace will have the toolchain path within the PATH environment variable.
Project Specific Toolchain Path
The previous instructions assumed that the toolchain was reachable through the build environment’s PATH variable. If the toolchain path wasn’t added to the eclipse environment or not added through the workspace environment settings then it must be added to the project environment itself. This can be achieved by opening the project’s properties and navigating to the C/C++ Build ->Environment panel.
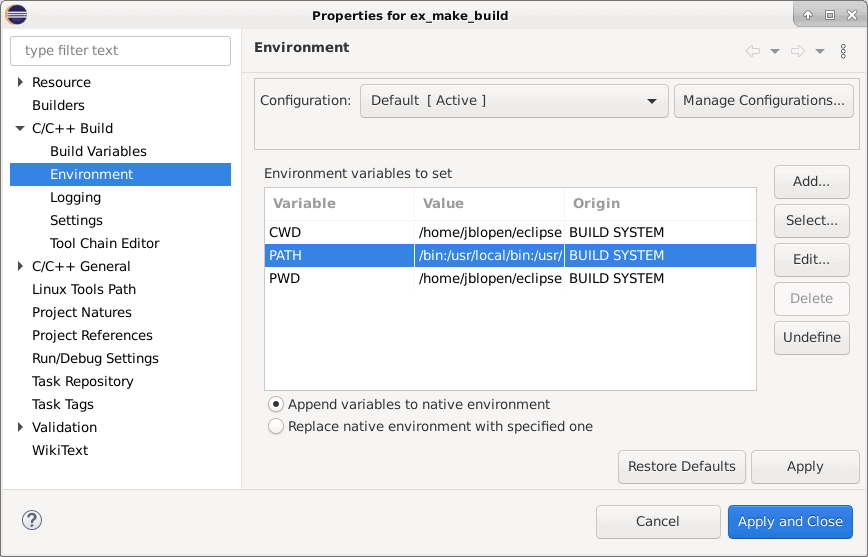
An existing PATH variable is most probably already defined from the build environment. Click edit to modify it.
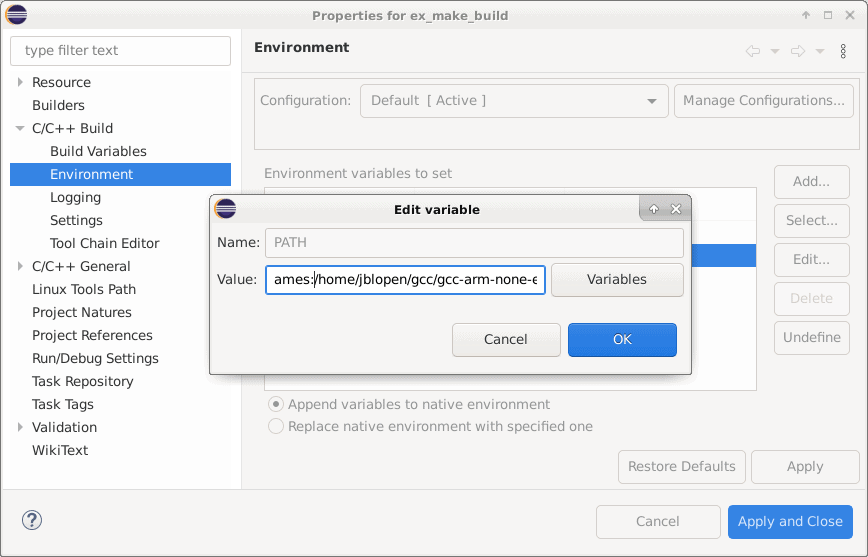
In the edit dialog append the path to the toolchain bin directory at the end of the existing paths by adding a colon followed by the path.
Click OK.
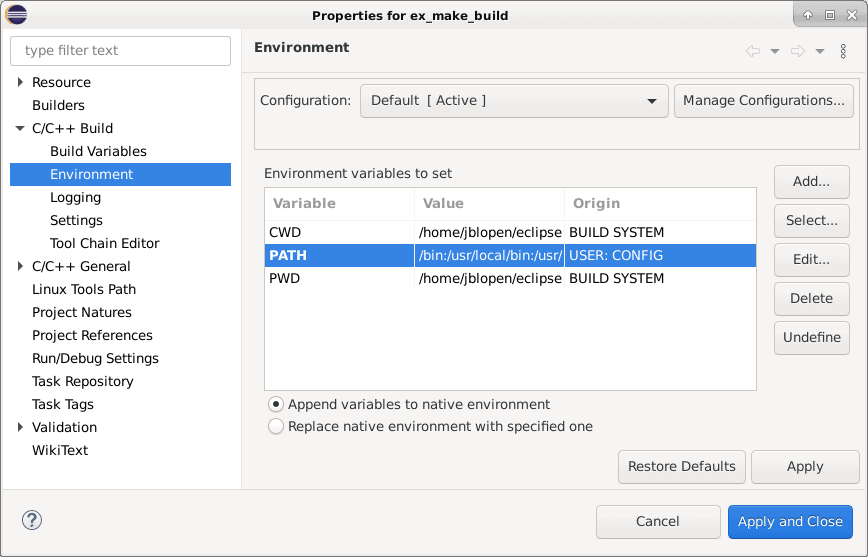
Click Apply and Close.
At this point the toolchain should be usable from this specific project. These last steps must be repeated for each individual projects when using this method.
Click here to see the Eclipse Debugging Guide to learn how to launch and debug and Eclipse project.
Visit the Documentation section for a PDF version of this guide including project and debugging setup.