A PDF version of this guide, including Eclipse setup and project debugging is available in the Documentation section.
This is the third part of this series on setting up a bare-metal GCC toolchain in Eclipse. The previous article explained how to set up a managed build project where Eclipse manages the build process automatically.
The other type of Eclipse project, a Makefile project, is more complicated to setup but offers greater control and flexibility over the build process. A Makefile based project is also independent of Eclipse and can be built and maintained easily outside of Eclipse. This can be useful for automated builds.
Workspace Setup
Some configuration is helpful at the workspace level when using a Makefile build, it is also a good idea to see if Eclipse has detected the toolchain that was added to the system PATH environment variable earlier in this guide.
First launch Eclipse if it’s not already started. The workspace selection prompt should appear.
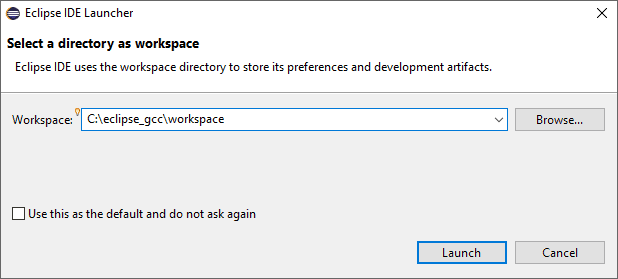
If a workspace was created during the Eclipse installation select it, otherwise create it now. It is strongly recommended to create a unique workspace that will be used exclusively for the projects related to the GCC toolchain that will be installed in this guide. The workspace selected should not have a path name that is excessively long and it is recommended not to use spaces in the path name either. To keep everything well contained and ordered this example will use “C:/eclipse_gcc/eclipse_workspace” as the
workspace.
Click “Launch”.
The Eclipse welcome screen should appear.
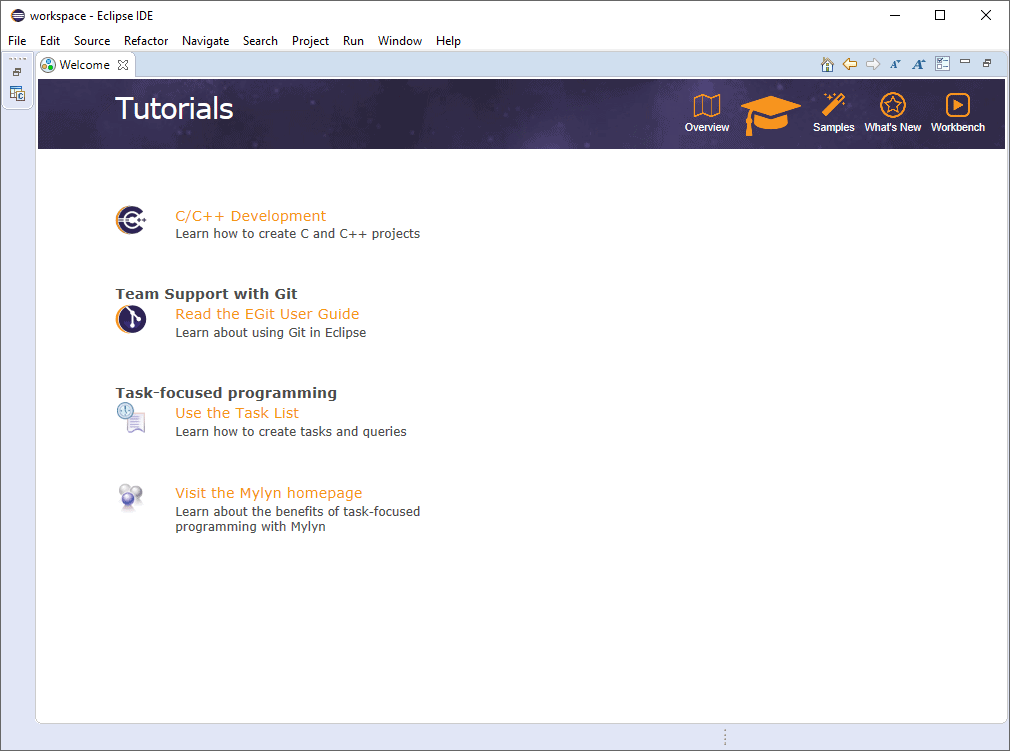
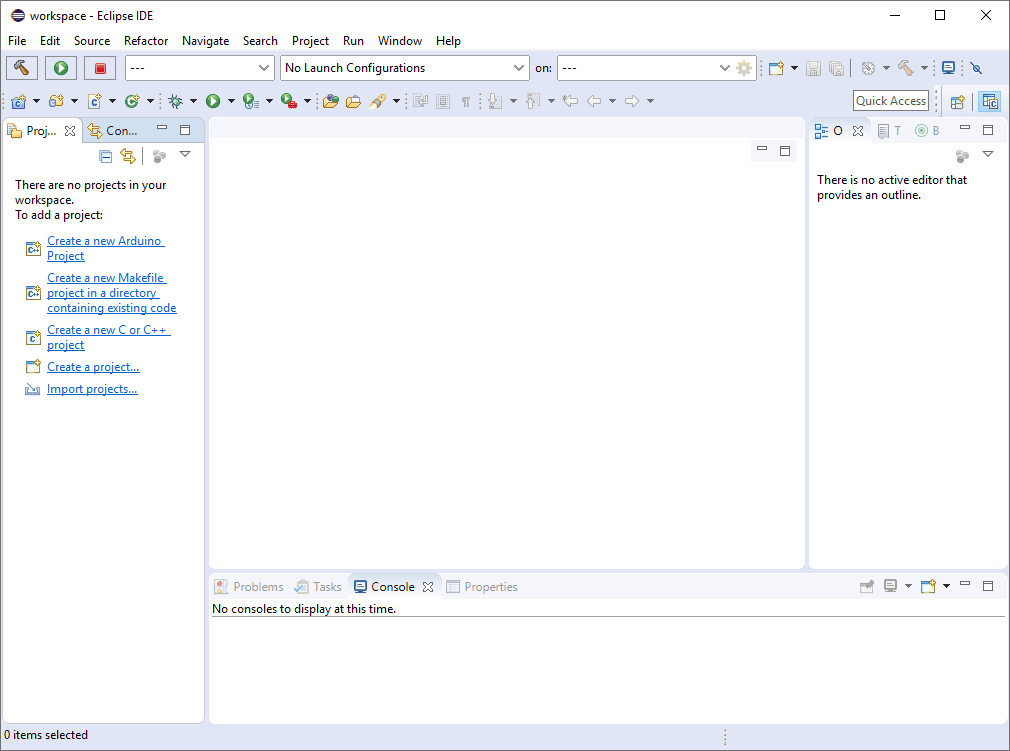
The welcome screen can be closed by pressing the X next to the Welcome tab. This reveals the main Eclipse view, which should be empty if this is a new workspace.
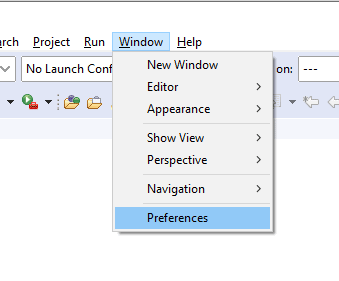
Open the workspace preferences by clicking the Window->Preferences menu entry.
Navigate to the “Core Build Toolchains” subsection of the “C/C++” section of the Preferences panel. This should display a list of detected toolchains. If the toolchain was installed correctly and was added to the PATH environment variable, it should appear in the list.
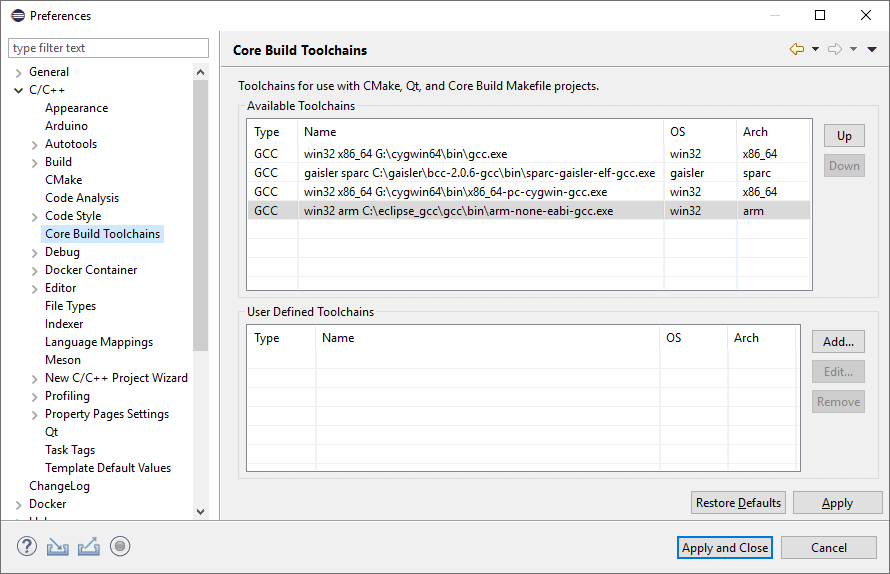
In this example the toolchain for ARM installed earlier was detected with the path to the main GCC executable being
C:/eclipse_gcc/gcc/bin/arm-none-eabi-gcc.exe correctly displayed.
Next it is helpful to change the Cross GCC compiler settings discovery for Eclipse CDT. This while help with some indexing issue later. To do so navigate to the “C/C++->Build->Settings” section of the Preferences panel and open the “Discovery” tab.
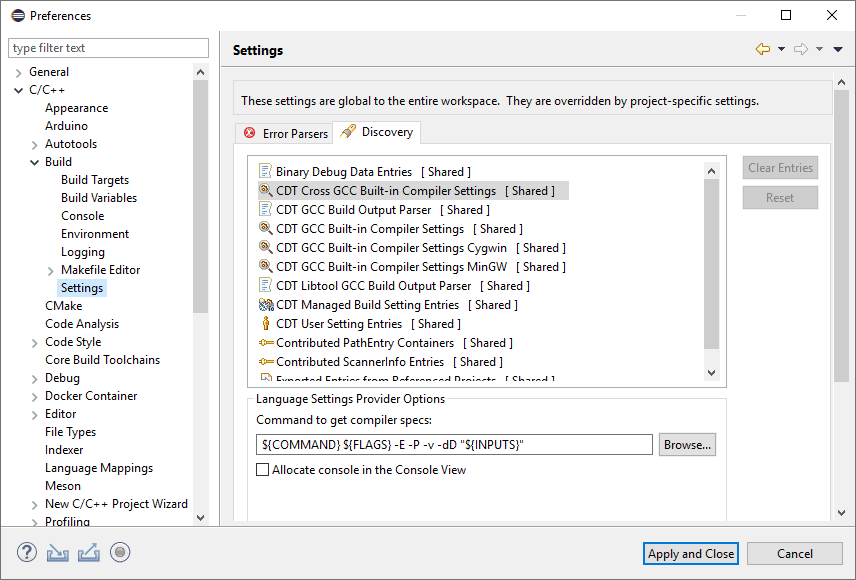
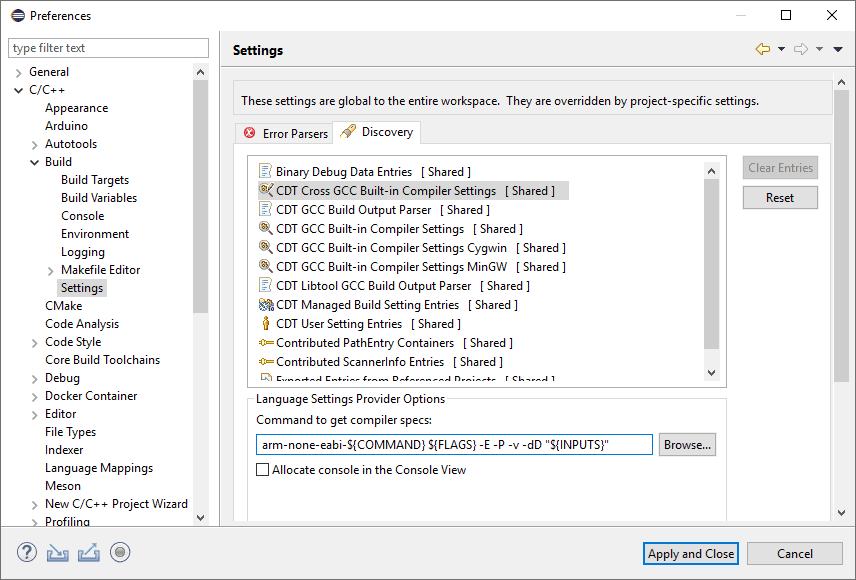
Click the “CDT Cross GCC Built-in Compiler Settings” item from the list. The “Command to get compiler specs:” box should be modified to add the toolchain prefix in front of the command. In our example “arm-none-eabi-“.
The result should look as follows:
That is all for the workspace configuration, click “Apply and Close” to apply and save the configuration.
Makefile Project Setup
When creating a new Makefile project, it is advisable to create it in a directory that already contains at least an empty Makefile. This is to ensure that the correct project type and nature are set when creating the project. The makefile should be named either “makefile” or “Makefile” with a capital M.
For this example we’ll use a directory named ex_make_build for the project with an empty Makefile named “makefile”.
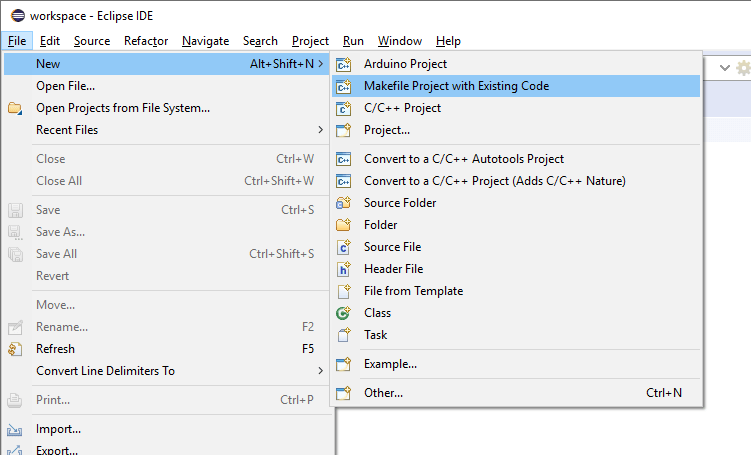
To create a new Makefile project select the File->New->Makefile Project With Existing Code menu entry
This should open the New Project dialog. Browse or type the path to the existing makefile created earlier or you source code to build. By default the project name is the same as the directory name but can be changed if desired. Finally, select “Cross GCC” as the toolchain.
The C and C++ checkboxes can be used to enable disable indexing of C++ or C code. If either of those will be found in your project, the corresponding box should be checked.
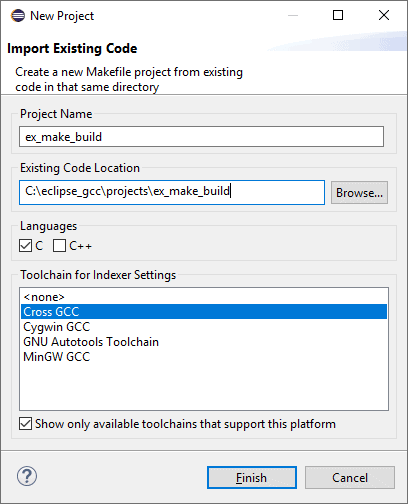
Click Finish. Eclipse will return to the main view with the newly created project in the workspace.

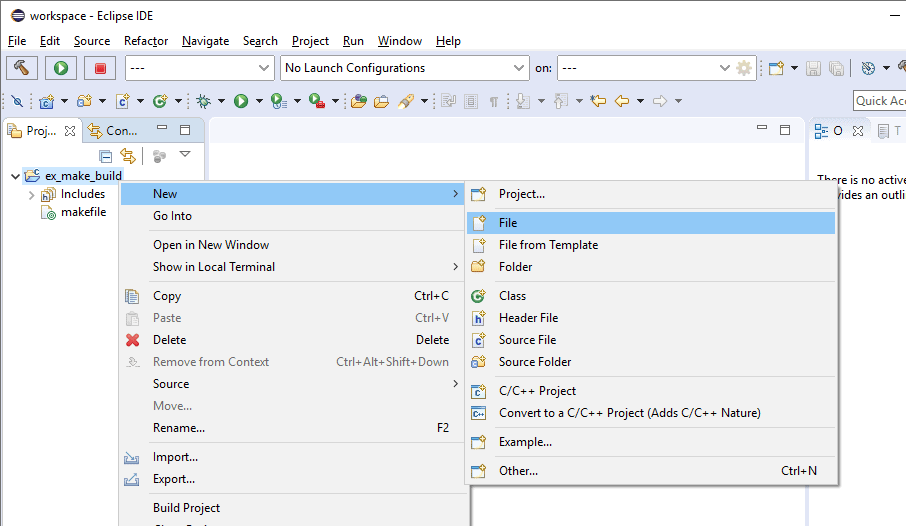
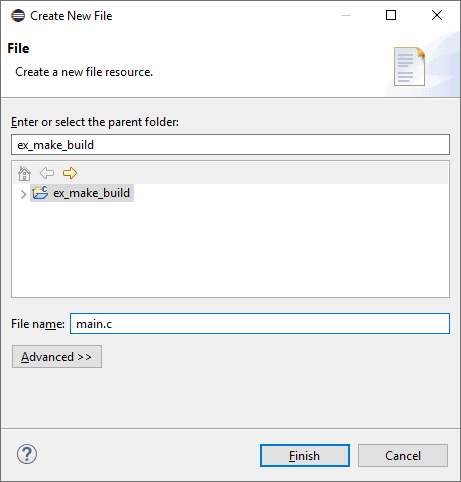
Let’s add a file to build named main.c with a minimal main function. To do so right-click on the project then click the New->file menu item.
In the “Create New File” dialog enter the name of the file, “main.c” in this example.
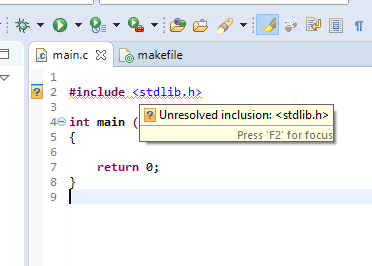
At this moment if a C or C++ include directive of a standard header is written in the C file, it will most probably be underlined stating that there is an unresolved inclusion. This is due to the CDT indexer being unable to invoke the cross compiler.
Note that if you have a native GCC compiler available in your environment PATH it might be used by default for indexing. In which case there won’t be unresolved inclusions reported by the indexer. However, since these headers do not match the current toolchain it can cause a few issues with code completion and indexing.
To fix this issue open the Project Properties, either by right-clicking on the project or selecting the project and opening the Project->Properties menu item.
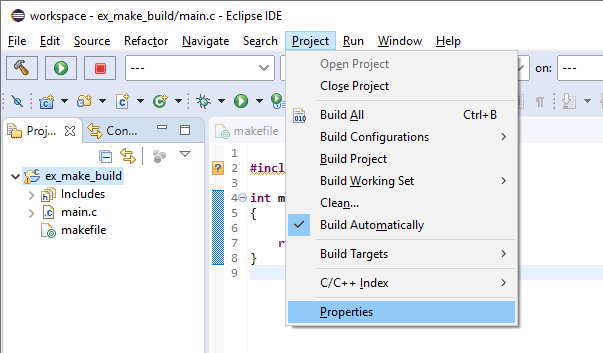
In the Properties panel navigate to the “Preprocessor Include Paths, Macros etc.” section of the “C/C++ General” category.

Assuming that the workspace setup was done, on this screen select the “CDT Cross GCC Built-in Compiler Settings” item and check the “Use global provider shared between projects” checkbox. This will change the provider’s configuration to the one we set in the workspace.
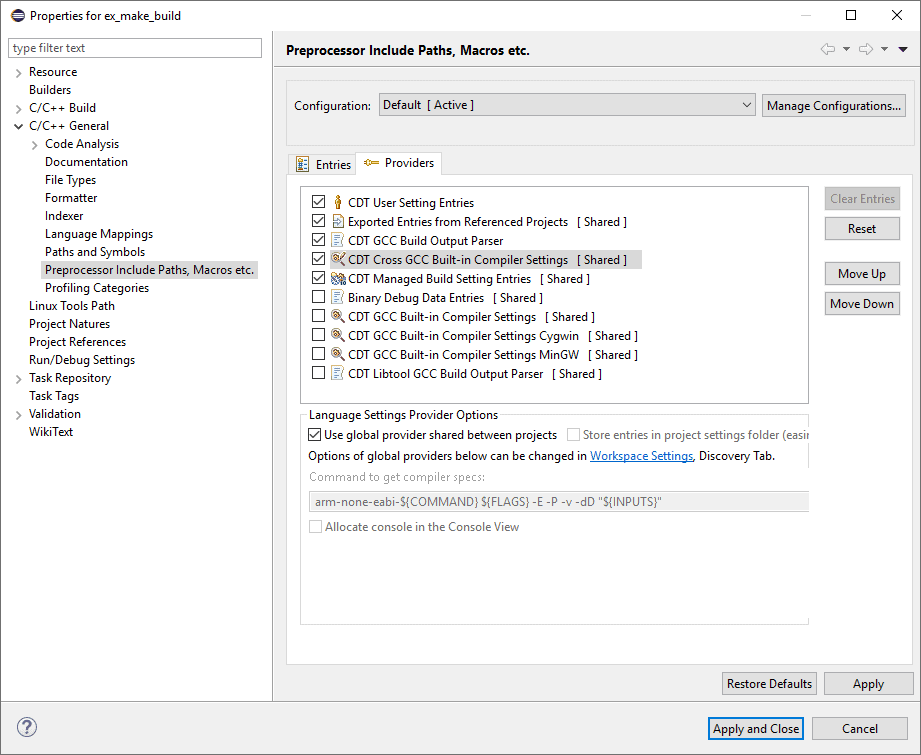
At this point the include files should no longer be unresolved. Now that the inclusions are fixed, we need a Makefile. Here is a minimal example Makefile:
# Intermediary objects working directory.
OBJDIR := obj

# Name of the output binary executable file.
LINK_TARGET := a.out

# Application source files list.
APP_SOURCE := main.c

# Name of toolchain executables to use.
CC := arm-none-eabi-gcc
AS := arm-none-eabi-gcc
AR := arm-none-eabi-ar
LD := arm-none-eabi-gcc

# C Build flags.
C_FLAGS := -mcpu=cortex-m4 -g -ffunction-sections --specs=nosys.specs

# C Build warning flags.
WARNING_FLAGS := -Wall -pedantic -Wconversion

# Configure include directories.
INCLUDEDIR = $(subst \,/,$(PWD)) \
             $(BSP_SRC_DIR) \

# Extract all the C source file names.
SOURCE += $(notdir $(APP_SOURCE))

# Compute intermediary object names.
OBJ += $(SOURCE:%.c=$(OBJDIR)/%.o)

# Build everything.
all : $(OBJDIR) $(LINK_TARGET)
    @echo All done

# Firmware binary linking.
$(LINK_TARGET) : $(OBJ)
    $(LD) -o $@ $^ $(C_FLAGS)

# C files build.
$(OBJDIR)/%.o : %.c | $(OBJDIR)
    $(CC) $(C_FLAGS) $(WARNING_FLAGS) -o $@ -c

$(OBJDIR) :
    mkdir $(OBJDIR)

.PHONY: clean
clean:
    rm -rf ${OBJDIR}
    rm -rf $(LINK_TARGET)
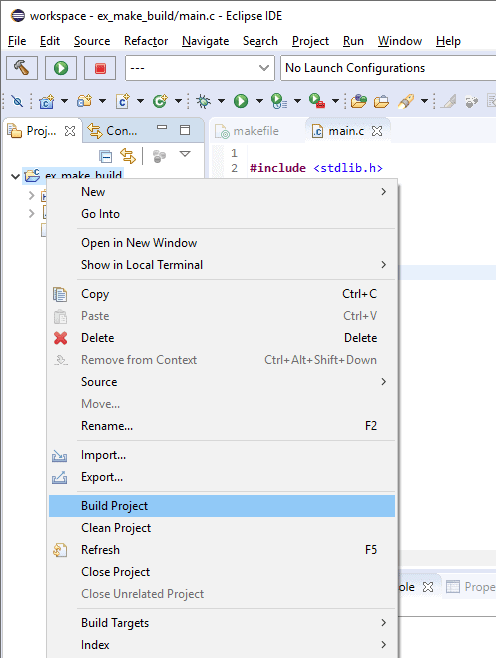
The project can now be built using the “Build Project” item from the context menu.
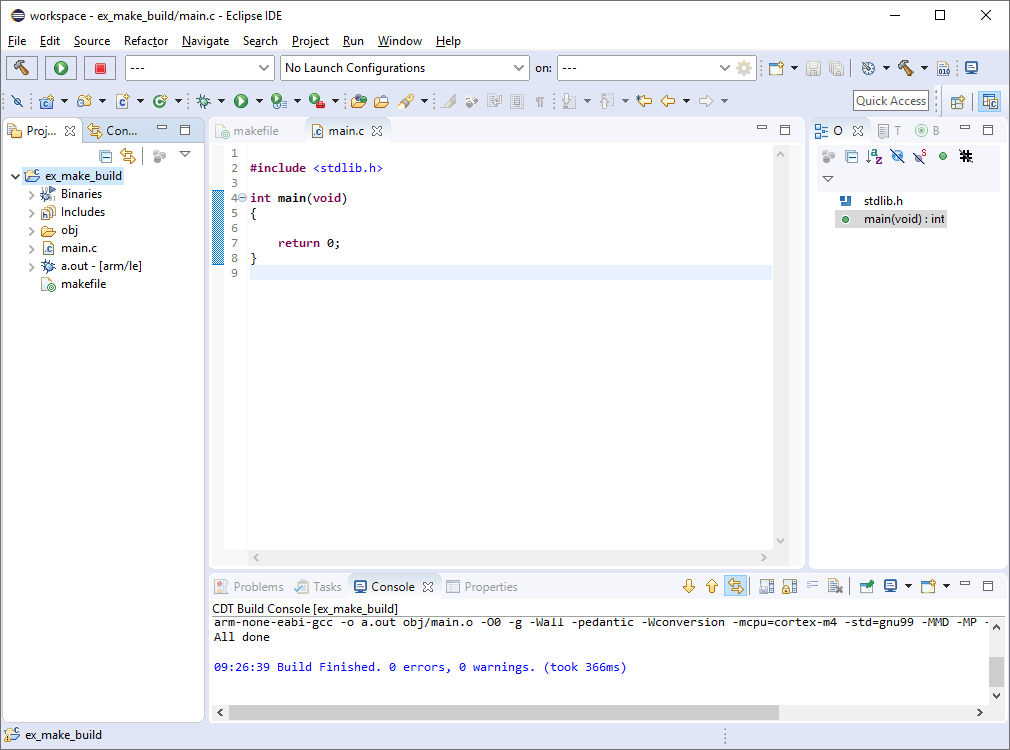
The Makefile project is now ready for development.
Indexing External Source Files
Oftentimes when using a Makefile project it is desirable to build source files that are outside the project directory. In that situation the indexer may not be able to find those files automatically which leads to unresolved inclusions warnings, code-completion issues and difficulty with debugging.
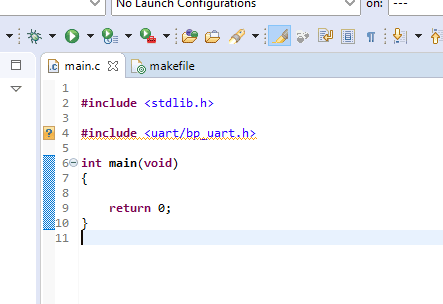
For example, in the previous screenshot the external include file uart/bp_uart.h is underlined in yellow, meaning it hasn’t
been found by the indexer.
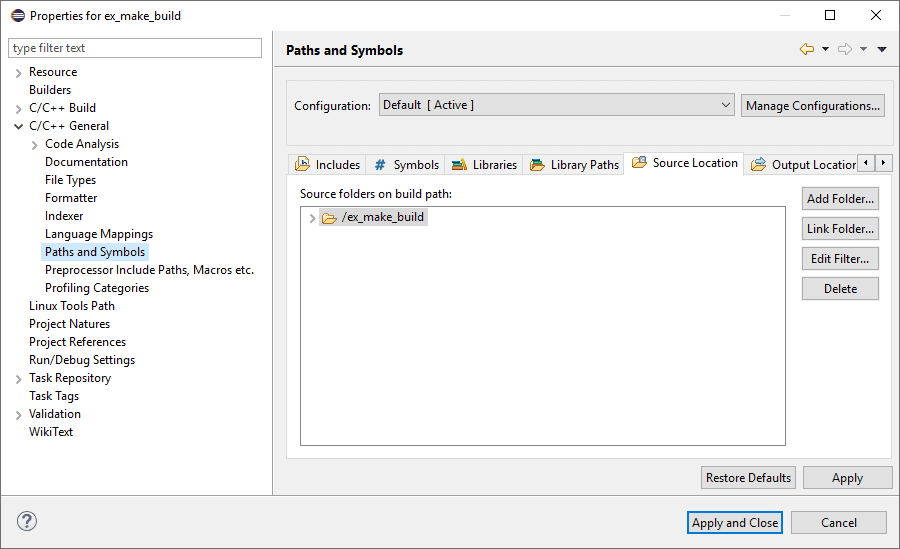
To solve this problem the path to the source files must be added in two locations. To do so open the project Properties and navigate to the “Paths and Symbols” On that screen open the “Source Location” tab. If it is not displayed use the arrows on the right which will show any hidden tabs on this panel.
To add a new external source location click “Link Folder”.
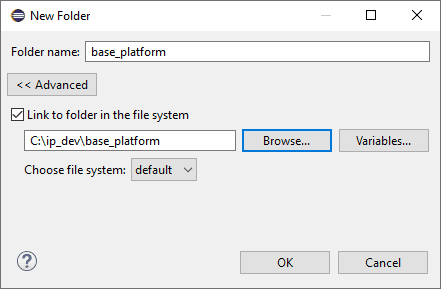
Check the “Link folder in the file system” box and then browse or type the location of the external source. In this example the external source code location is the “C:/ip_dev/base_platform” directory. Click OK to add the directory.
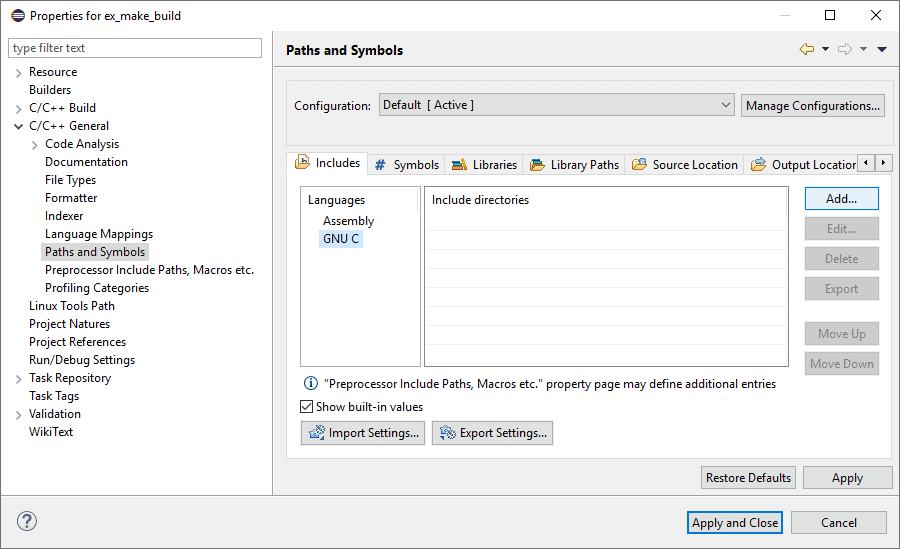
Once the source location is linked, it is necessary to add the location to the indexer’s include path. To do so open the “Includes” tab. And select either GNU C or GNU C++ depending on your project type.
Note that in the case both C and C++ was selected when initially creating the project, CDT will use the C++ compiler for indexing. In this case it’s important to add the include files paths to the GNU C++ language and note GNU C.
Click “Workspace…” to add a workspace location.
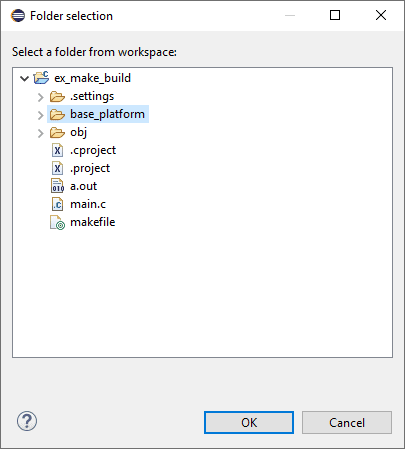
Select the previously created workspace link, in this example “base_platform”. Then click OK to add the path.
After doing the procedure for each external source location, they should be properly indexed and reachable during a debugging session.
That is it for part 3, please read part 4 if you are interested in the the debug configuration using GDB. Check out part 1 for the Eclipse and toolchain configuration guide as well as part 2 for the managed build project setup.
Visit the Documentation section for a PDF version of this guide including Eclipse and debugging setup.
Questions or comments? Do not hesitate to contact us at blog@jblopen.com. Your questions, comments and, suggestions are appreciated.