A PDF version of this guide, including project setup and debugging is available in the Documentation section.
This guide is targeted at Linux users, similar instructions for Windows can be found here.
This guide is the first part of a Linux version of the guide we previously wrote dealing with setting up an embedded software toolchain within Eclipse. This guide is targeted at readers who need to set up a GCC toolchain within a vanilla Eclipse installation. This guide is written with embedded software development for MCU and SoCs in mind but can be used with any GCC toolchain regardless of the intended target. Note that there are many combinations of Eclipse versions, plugins and supporting tools that can be used to successfully build C and C++ applications using the GCC toolchain, this document is the recommended way by JBLopen but readers are free to modify their development environment to suit their needs.
Setup Guide
This step-by-step section will go through the installation and configuration of the following components in order:
- Eclipse – 2020.06 – eclipse-inst-linux64.tar.gz
- GCC – 9-2020q2 – gcc-arm-none-eabi-9-2020-q2-update-x86_64-linux.tar.bz2
The versions cited above are those that were used when writing this guide. Installation instructions for newer versions, if available, should be similar.
Eclipse Installation
The first package to install is the Eclipse IDE. As is usual with Linux, there’s more than one way to install Eclipse. This guide will use the official Eclipse installer from eclipse.org which will install Eclipse within the current user’s home directory. This is the simplest method and is also useful since it isolates the Eclipse installation from any native installation that may exist.
Start by extracting the installation archive and executing the installer file. Note that if possible the 64-bit version of Eclipse is strongly recommended. In this example eclipse-inst, the following screen should appear.
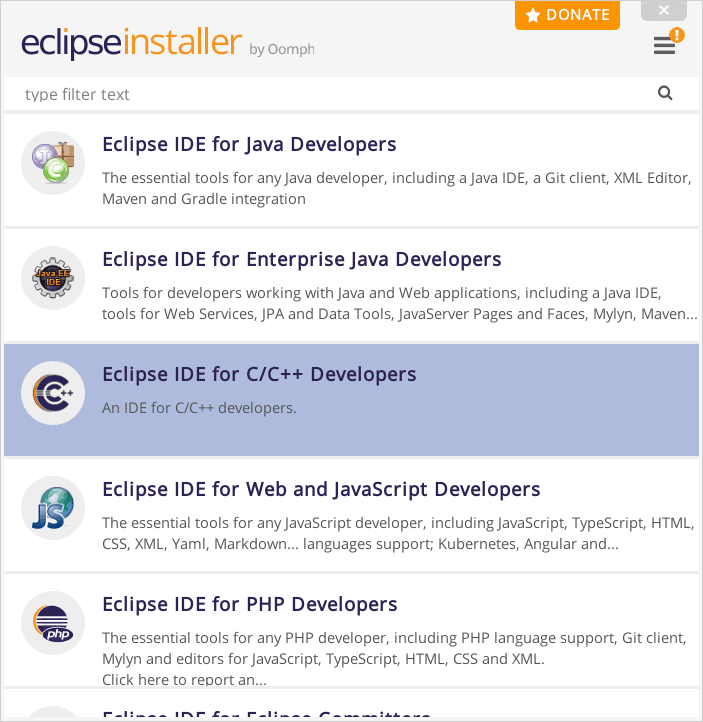
Select “Eclipse IDE for C/C++ Developers” by clicking it. The install configuration screen should appear.
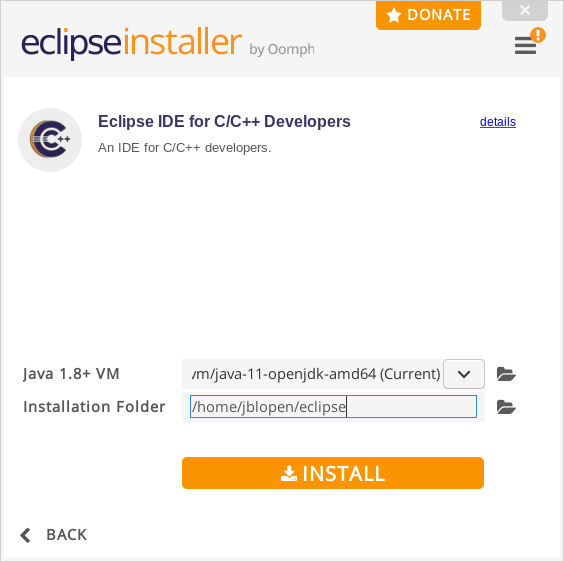
Set the installation directory, it is recommended to use a unique directory that is short with no spaces in the name as the eclipse install directory. In this example we will use /home/jblopen/eclipse as the installation directory. The eclipse installer will automatically create an eclipse subdirectory inside the specified installation path.
Click install. Installation should start and a progress bar should be displayed.
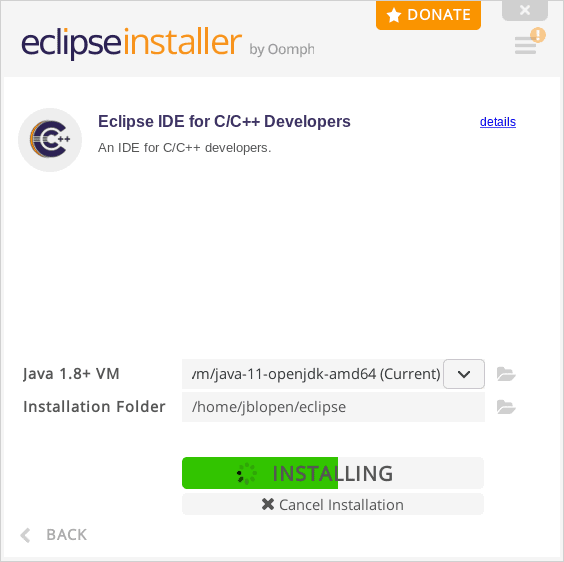
Installation should proceed.
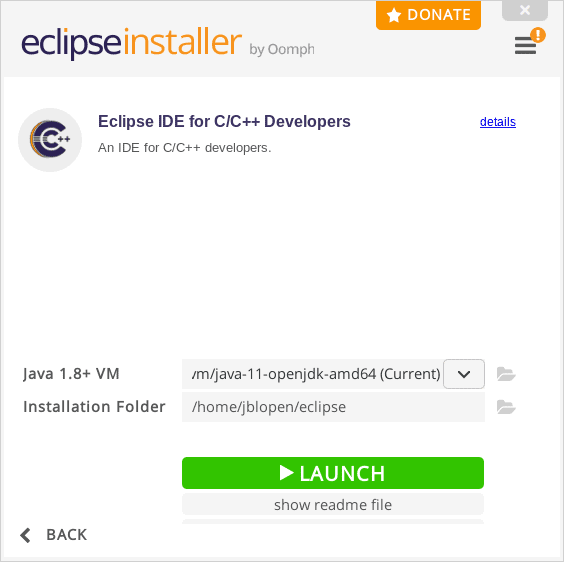
Launch the installation to check if it’s working properly and create the first workspace. Do so by clicking Launch.
The workspace selection prompt should appear.
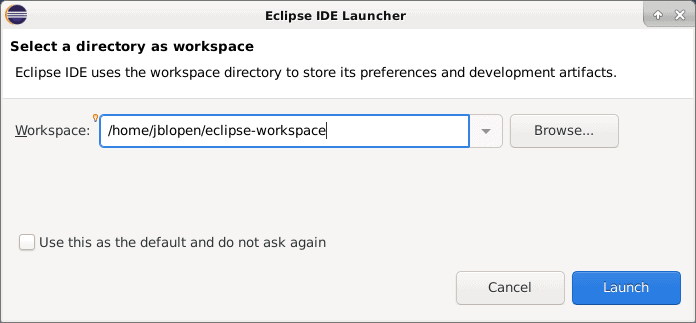
It is strongly recommended to create a unique workspace that will be used exclusively for the projects related to the GCC toolchain that will be installed in this guide. The workspace selected should not have a path name that is excessively long and it is recommended not to use spaces in the path name either. To keep everything well contained and ordered this example will use /home/jblopen/eclipse-workspace as the workspace.
Click Launch.
The Eclipse welcome screen should appear.
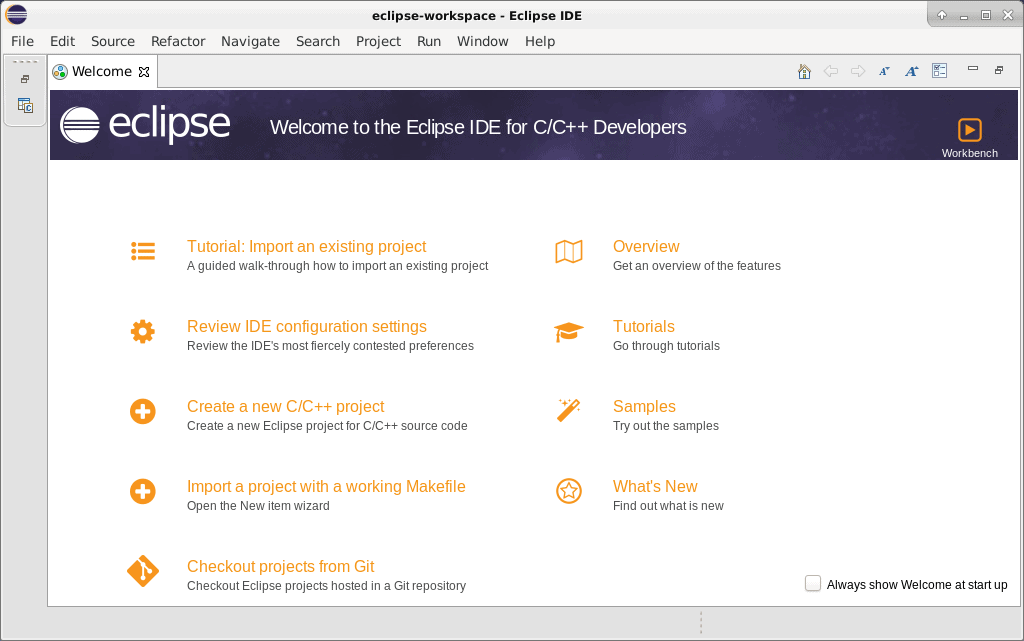
Eclipse can be closed at this point as there are more packages to install before setting up the Eclipse IDE.
Toolchain Installation
This guide will use as an example the GNU Embedded Toolchain for Cortex-R and M distributed by ARM. However the procedure should be very similar to other embedded GCC toolchains.
First the downloaded toolchain archive should be extracted to a suitable location. In this example we will create a directory named gcc in the current user home directory and then extract the toolchain into that directory. This can be done, for example, by executing the following commands from the directory that contains the downloaded archive.
$ mkdir ~/gcc
$ tar -xvf gcc-arm-none-eabi-9-2020-q2-update-x86_64-linux.tar.bz2 -C ~/gcc/
That’s about it for the toolchain installation on Linux. Optionally, the toolchain can be added to the PATH variable as shown in the next section.
GNU Make Installation
In addition to the toolchain and Eclipse it is usually necessary to at least have the GNU Make utility to process makefiles. This utility may already be installed, if not there’s usually a package containing the minimal set of applications required to build.
Under Debian, Ubuntu and many others one can simply install the build-essential package. For example by running the following command:
$ sudo apt-get install build-essential
PATH Environment Variable Setup
It is not necessary to add the toolchain to the PATH environment variable to use the newly installed toolchain in Eclipse. However, it can be useful for building directly from the command line.
One can notice that they are usually two bin directories available within a GCC toolchain distribution. One directory contains all of the toolchain’s executables prefixed with the target triplet, i.e. arm-none-eabi-gcc while the other contains generic names without the host triplets. When adding the toolchain to the PATH environment variable, it is important to use the directory where the executables are prefixed with the target triplet. First the other directory doesn’t contain all the necessary executables, but may interfere with the OS native toolchain.
To add the toolchain to the PATH, add or edit the following line of the .bashrc file located in the home directory of the current user. It’s usually a good idea to add it to the end of the list to prevent conflicts.
export PATH=$PATH:/home/jblopen/gcc/gcc-arm-none-eabi-9-2020-q2-update/bin
When updating the PATH variable like this Eclipse will not see the new toolchain if Eclipse is launched from the desktop environment. This can be fixed by launching Eclipse from the command line, for example:
$ nohup ./eclipse &
Additional methods of adding the toolchain to Eclipse will be discussed in the next part of this series.
Click here to read part two of this series.
Visit the Documentation section for a PDF version of this guide including project and debugging setup.