What would make a better first post about embedded software than a hello world project on a brand-new development board. It’s the krtkl snickerdoodle I received with much excitement last week. The SoM is based on the Xilinx Zynq-7000 SoC along with storage and wifi on the SoM. In these next series of articles, I’m going to explore the capabilities of the snickerdoodle as a development platform for a high-performance real-time operating system. In this first article, I’ll run Micrium’s µC/OS, a commercial RTOS, on the snickerdoodle.
Before going any further, I think it’s important to mention that the snickerdoodle, with various optional base boards and accessories, can still be pre-ordered from Crowd Supply. Expected shipping date is around August.
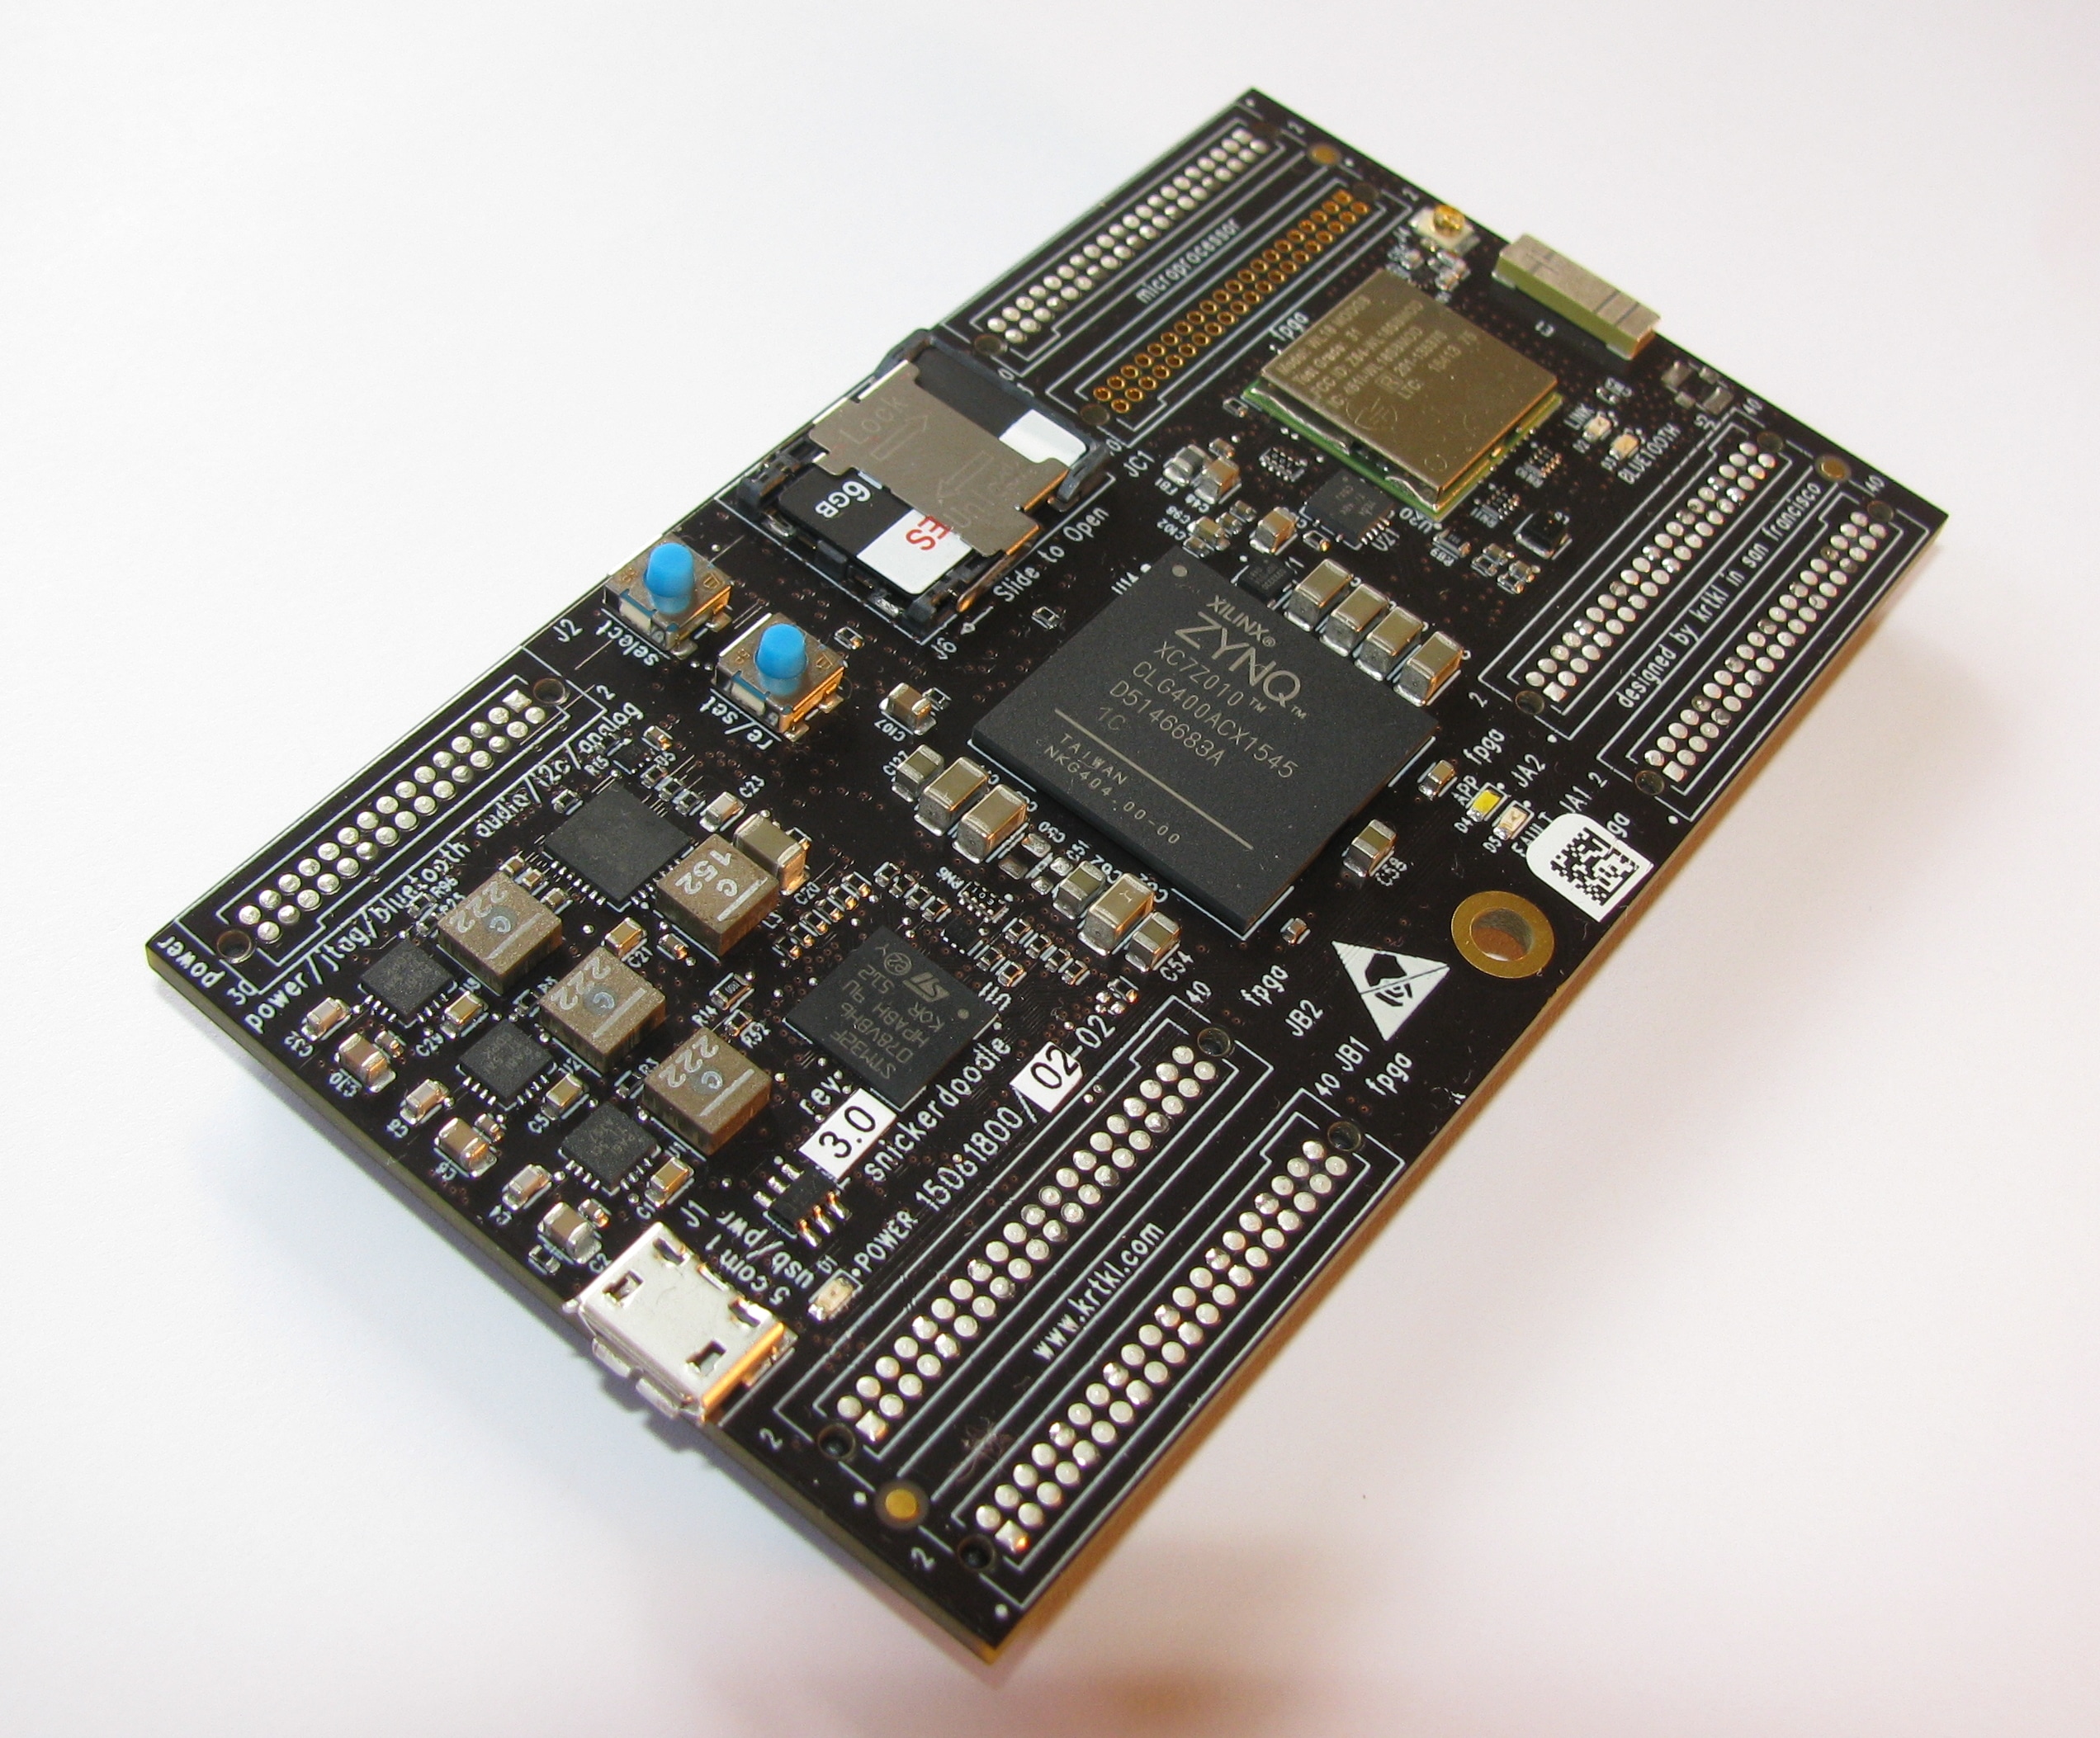
The snickerdoodle
The snickerdoodle — at least on the surface — is a traditional SoM, packing a Zynq 7010 SoC. Not only is it very compact and affordable (72$ USD at the time of writing), it comes standard with quite a few features. First, the board comes in two major versions, each featuring 1 GiB of LPDDR2. The first is equipped with the Zynq 7010 667Mhz dual core ARM SoC with a 17.3k LUTs FPGA. The second one dubbed the snickerdoodle black is about twice as expensive but uses the Zynq 7020 866Mhz SoC with a bigger 53.2k LUTs FPGA.
In addition, the snickerdoodle features a Wi-Fi/Bluetooth radio, microSD card slot, on-board NOR flash, USB to serial adapter, as well as an STM32 Cortex-M MCU used as a platform manager — not to mention up to 179 configurable I/Os. It includes all of the above without any shield or base board of any kind.
µC/OS on the snickerdoodle
Micrium’s µC/OS can easily be used thanks to the µC/OS BSP for the Xilinx SDK, which is available for download from the Micrium website. The download is free but registration is required. An excellent video tutorial on installing and using the BSP is available as well as a text tutorial.
Trying out the snickerdoodle
I’ve performed the usual steps to create a hardware definition for the Xilinx SDK using Vivado 2016.2. Something of note: starting with 2016.2, Vivado does not require a licence for the free WebPack edition. This greatly simplifies installation when you just want to get going with a development board like the snickerdoodle.
Since Vivado does not know about the board, it’s definition files must be installed manually. The board files for the snickerdoodle and snickerdoodle black are available on the krtkl github.
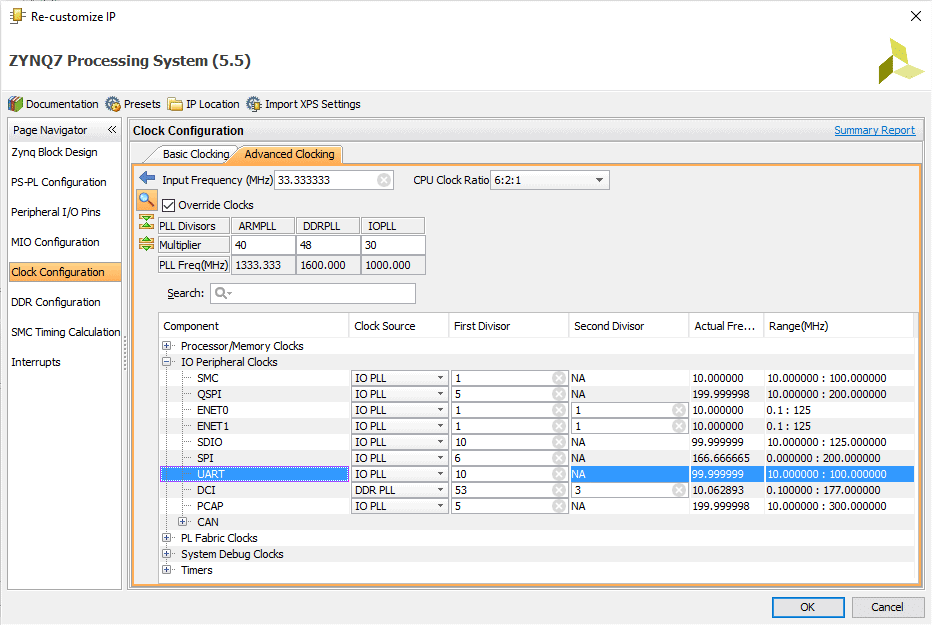
For simplicity I wanted to use the U-Boot bootloader from the Linux SD Card images, which can be downloaded from the krtkl website. This is mainly because, without any base board, there is no easy JTAG access. I noticed, however, that the UART reference clock is configured differently between U-Boot and the default FSBL. If you intend to use U-Boot to boot a bare-metal or RTOS, I recommend changing the clock right now to prevent issues in the future. To do so, navigate to the advanced clock configuration of the Zynq block from the Vivado IP integrator, and change the UART1 ref clock from 50Mhz to 100Mhz to match the U-Boot configuration.
Having exported the hardware definition to the Xilinx SDK, installed Micrium’s BSP, and created the µC/OS-III demo application, I now am ready to see if it’ll work out of the box. For the sake of the demonstration, the basic demo was modified to make it a bit more appropriate for the occasion.
void MainTask(void *p_arg)
{
    OS_ERR  os_err;

    UCOS_Print("Hello World! from the snickerdoodle\r\n");

    while (DEF_TRUE) {
        OSTimeDlyHMSM(0, 0, 10, 0, OS_OPT_TIME_HMSM_STRICT, &os_err);
        UCOS_Print("Periodic output every 10 seconds from the main task\r\n");
    }
}
To simplify things, I copied the elf file to the Linux SD card, and used bootelf to start the application. And indeed, the snickerdoodle said hello.

Questions or comments?
Do not hesitate to contact us at blog@jblopen.com. Your questions, comments and, suggestions are appreciated.